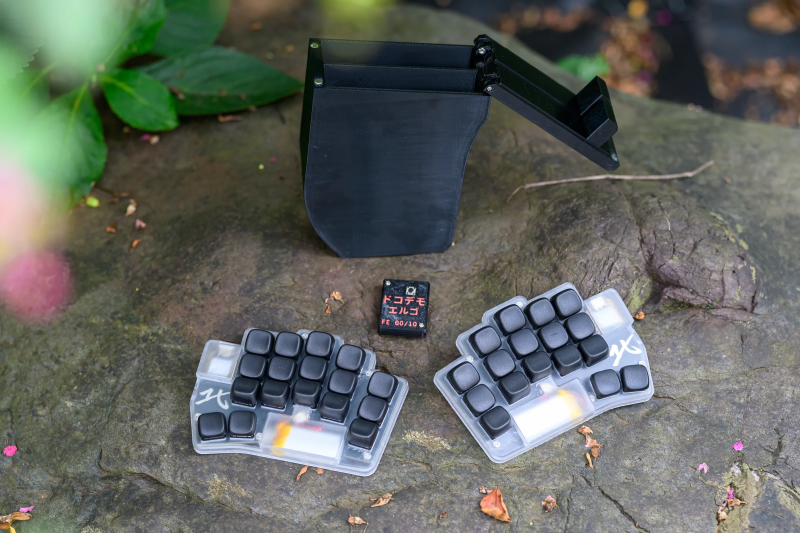
After dropping my previous project, I decided to finally design a new keyboard.
It had been in the back of my mind for about a year. I liked my Sweep but faced many issues with it, particularly with the battery.
DokoDemo Ergo Zero#
Speccing it out#
From the start, I knew I wanted to try creating a keyboard that could be easily manufactured in small batches.
I love split ergo keyboards, and I want to make them more accessible.
Unfortunately, the commercial options at the moment are both prohibitively expensive and don’t even have what I would consider the bare minimum features:
- Wireless
- Low profile
- Easy mounting/tenting
- Great switches and typing experience
The Keychron Orca echo looks like it will be pretty close to what I have in mind, but even this one doesn’t ship with great switches and for some reason does not have keys under the right thumb (wut?).
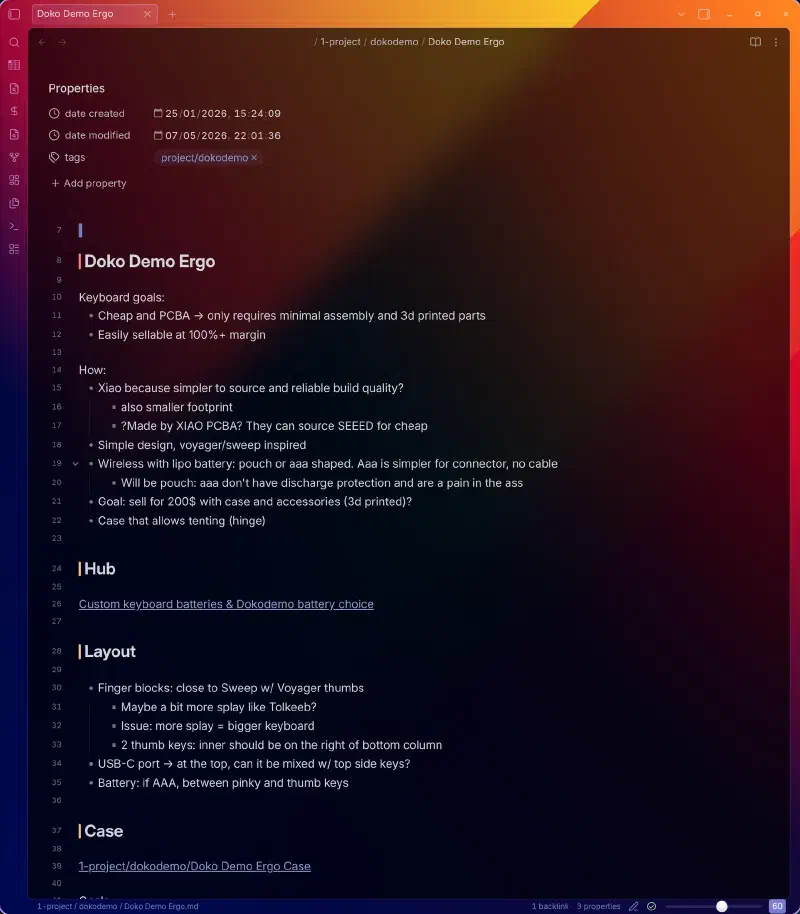
So I started with the following goals written out:
Building it#
I fired up a new ergogen repo and started building.
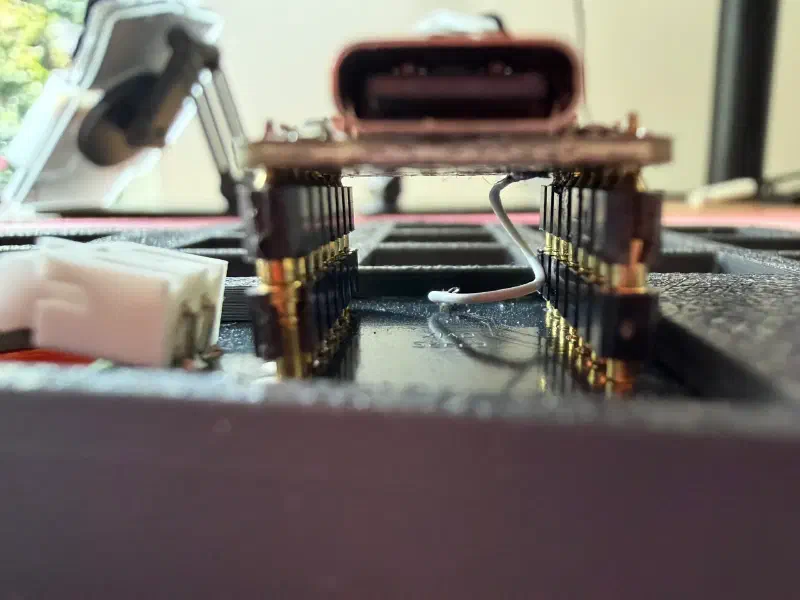
I used the Seeed XIAO BLE to simplify battery management and the wireless stack while keeping a small footprint.
The only issue was that connecting to the XIAO’s battery pad also required soldering its underside, so I added a pad on the PCB a few centimeters away and connected it to the socketed controller with a wire. Looks scuffed, but it works:
I ordered the PCBs from JLCPCB on April 28th.
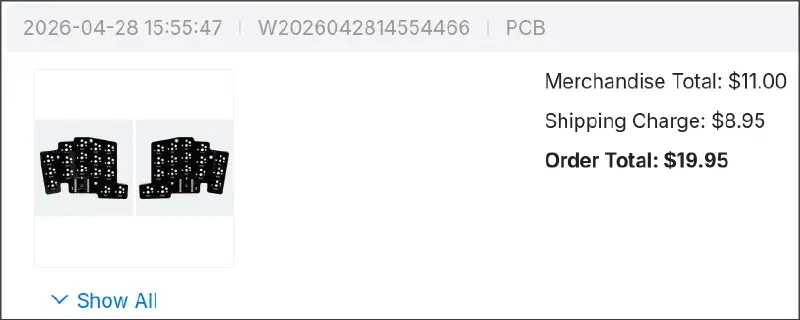
A week later, I had designed and built my first-ever wireless split keyboard!
In the process I started learning FreeCAD 1.1 to design cases. I’m at a point in my life where I just abandon software that does not run on Linux. Life is too short for shitty operating systems.
I felt like the keyboard still looked pretty meh but I shared my progress on Reddit, quickly going over the design choices and using some basic smartphone photos.
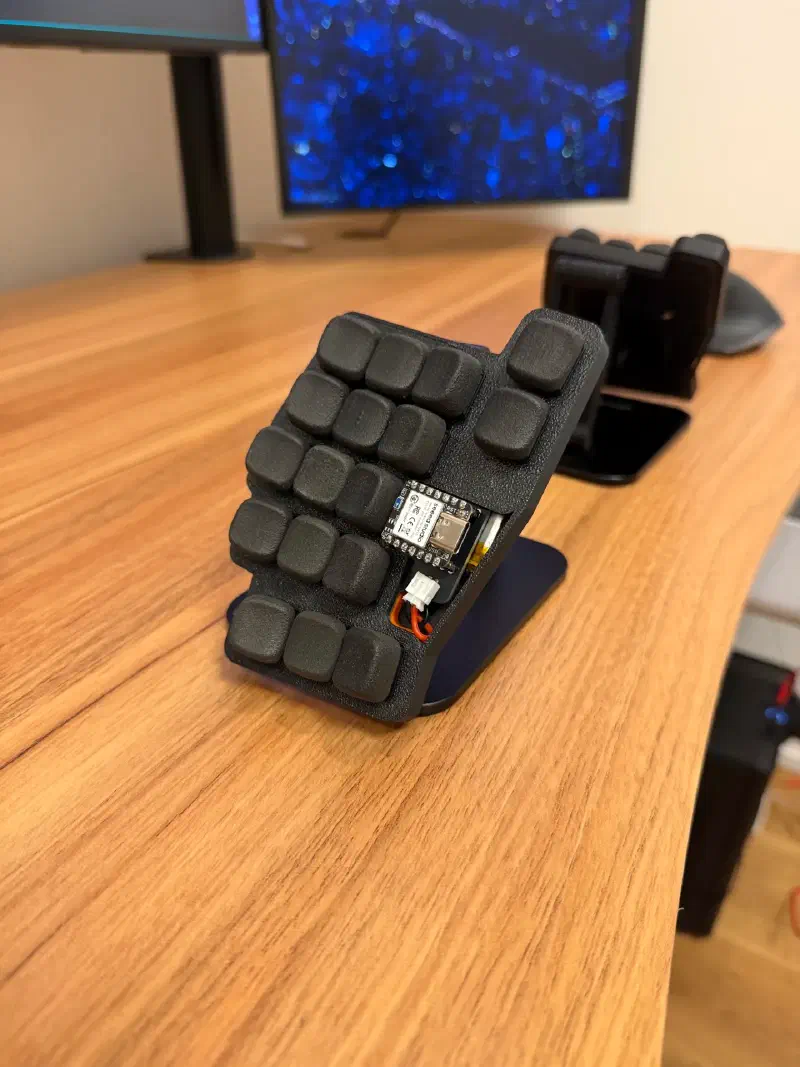
Over 27k views later, I realized I was not the only one who thought this was the right set of specs for a keyboard! The community feedback was extremely positive, and it motivated me to do a new version.
Wasting time#
Then I spent 3 weeks trying to make UV mapping work well with 3D printing to do a cool multicolor case.
I got a bit lost in the specifics, trying to learn Blender and Inkscape, before realizing I maybe should focus on the keyboard itself first.
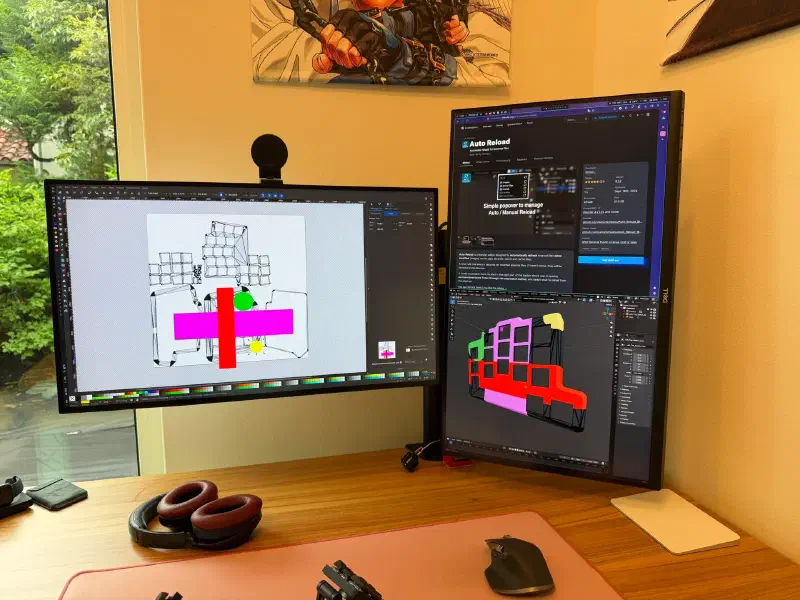
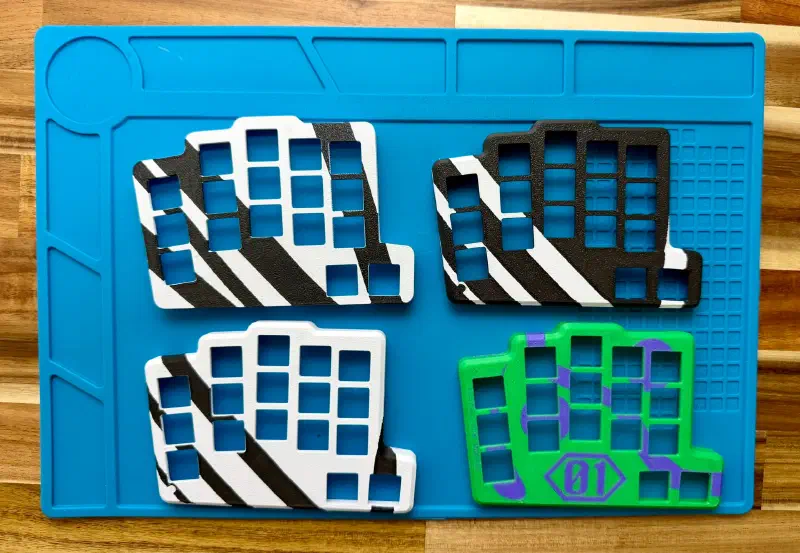
I will come back to it at some point. It does look sick.
DokoDemo Ergo One#
For the first time in my keyboard journey, I didn’t pause the project here while using the keyboard for a year.
I knew I could make it better, and I knew how.
We have SMT at home#
Clearly, the biggest pain point in building the v0 was the controller. The sockets made it very tall, and while it didn’t create issues during typing, it looked ugly.
The best way was to surface mount the controller as it would allow me to solder the battery pin properly.
But PCB assembly (PCBA) is relatively expensive because of all the setup costs, and I didn’t want to commit to it yet.
I therefore decided to give hot plate soldering a try.
It’s pretty simple, really: plate hot, PCB hot, solder paste melt, connection done.
And since I was doing it fully solo at home, I decided to move all components to the same side. As hotswap sockets have to be on the bottom, all components moved there. This also made the case much simpler as the top was now fully flat, and it gave it a very clean look.
The tradeoff was of course a few millimeters of extra height.
But it seemed so much simpler to manufacture that way, I gave it a shot.
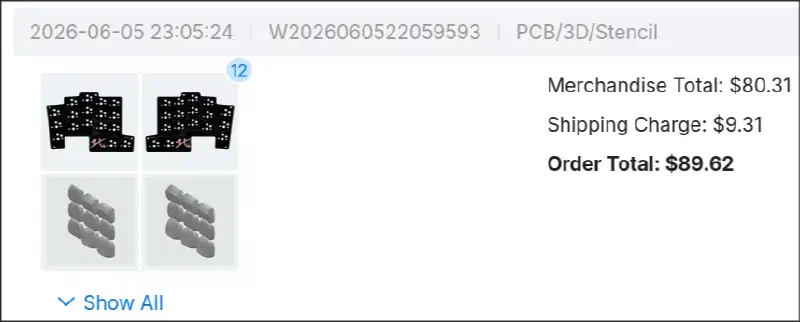
A few hours later, my PCB was ready and ordered, together with a few cases and even keycaps.
And a website#
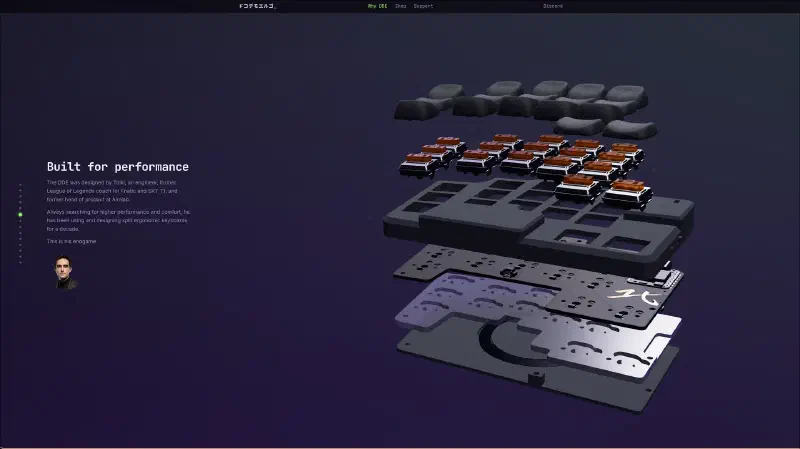
At this point I also wanted to gauge interest in the project, so I thought I should create a small website.
I wrote down the plan, structure, and views on paper, then I paid $20 to Anthropic for access to Fable.
I then whipped this up in two days: Tolkeebs shop. I think it’s pretty sick.
I then posted another interest check on Reddit with a fully plastic prototype and once again, the reaction was extremely positive.
In a few hours, I hit over 100 subscriptions to the mailing list.
The hot plate and me#
Then I received the PCBs, and it was time to try the hot plate:
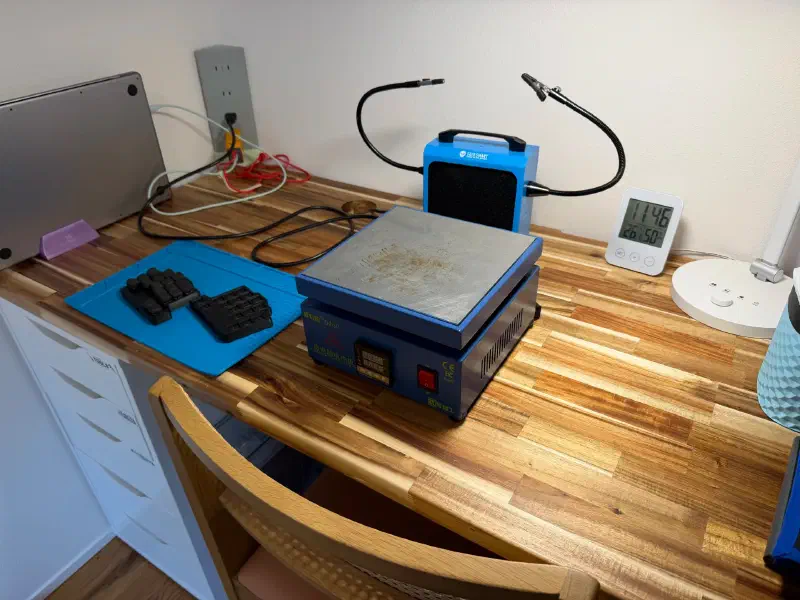
The thing is… a cheap hot plate does not really heat the whole surface uniformly, and I had many bridging issues on my first few tries.
I felt like a cook, looking over the dish every few seconds to see if it was cooked, moving it around the plate to make sure all parts of the PCB were heated…
Safe to say I wasn’t a fan. I could see myself using it for prototypes, but not for producing 10 units. I would need to make the jump to PCBA.
Making it look cool#
While FDM 3D printing is nice for prototyping or secondary parts, I felt like I needed something with better looks if I wanted to sell it to users.
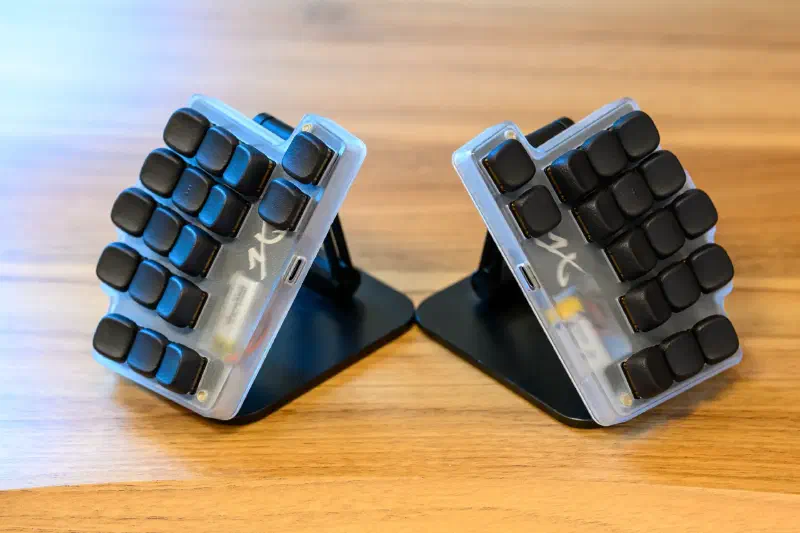
So I started ordering cases for my keyboard with more advanced 3D printing processes:
- Translucent resin
- MJF dyed matte black
v1 vs v0: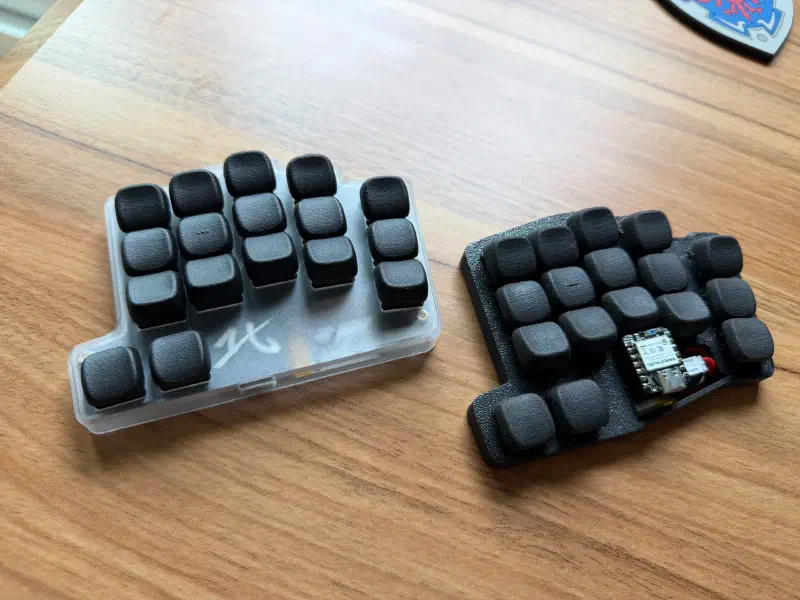
MJF black: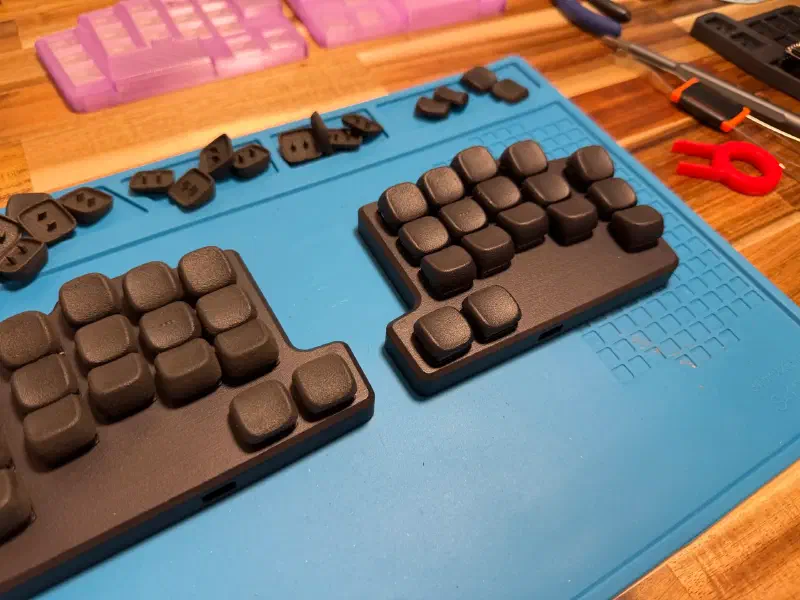
In the end, the casing of the keyboard and the switches are the most visually important part of the product, so I wanted to make sure I could offer something that feels premium.
I really think the translucent version ended up looking great, re-using my Hokuto Esports logo as naked copper visible through the case!
Using the DDEv1#
After using it for a few days… I couldn’t shake the feeling that I could make it slimmer.
I created a Discord server to be able to chat with people interested in the keyboard without spamming Reddit, and used that to run a few polls.
And people agreed with me:
- The thinner, the better
- 34 keys > 36 keys
With my confirmation bias fully locked in, I designed the next version.
DokoDemo Ergo FE Prototype#
While my experience with hot plate SMT had been meh, it was good for soldering the controller.
But why not use it just for the controller, then flip the PCB and solder the hotswap sockets by hand?
So I started the third prototype with the controller back on top together with the battery connector. I added bulges to the top side of the case to fit those connectors.
While it looks less “clean” than the v1, it made the keys sit ~4mm lower. This also means that when traveling with the keyboard, you can make the travel box almost 1cm slimmer. A worthwhile tradeoff.
I could now also fit a fat battery, and the capacity jumped from 100mAh to 650mAh. According to ZMK’s profiler that’s about one year of battery life in dongle mode. Pretty good.
And finally, I decided to go wild with the thumbs: with every single prototype, I was pushing the thumbs a few millimeters farther away, and by that point I just thought I’d try aligning the thumb keys with the inner index column.
So I ordered PCBs and cases again, built the keyboard… And this time, it felt ready for the big show.
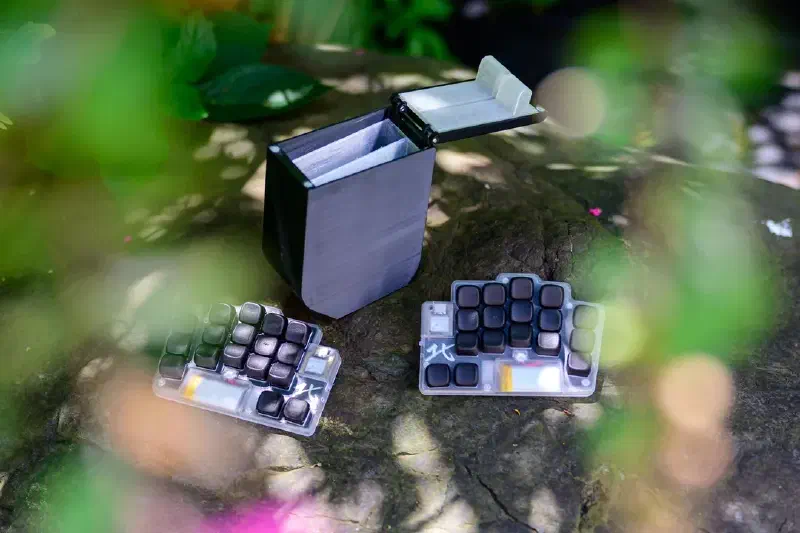
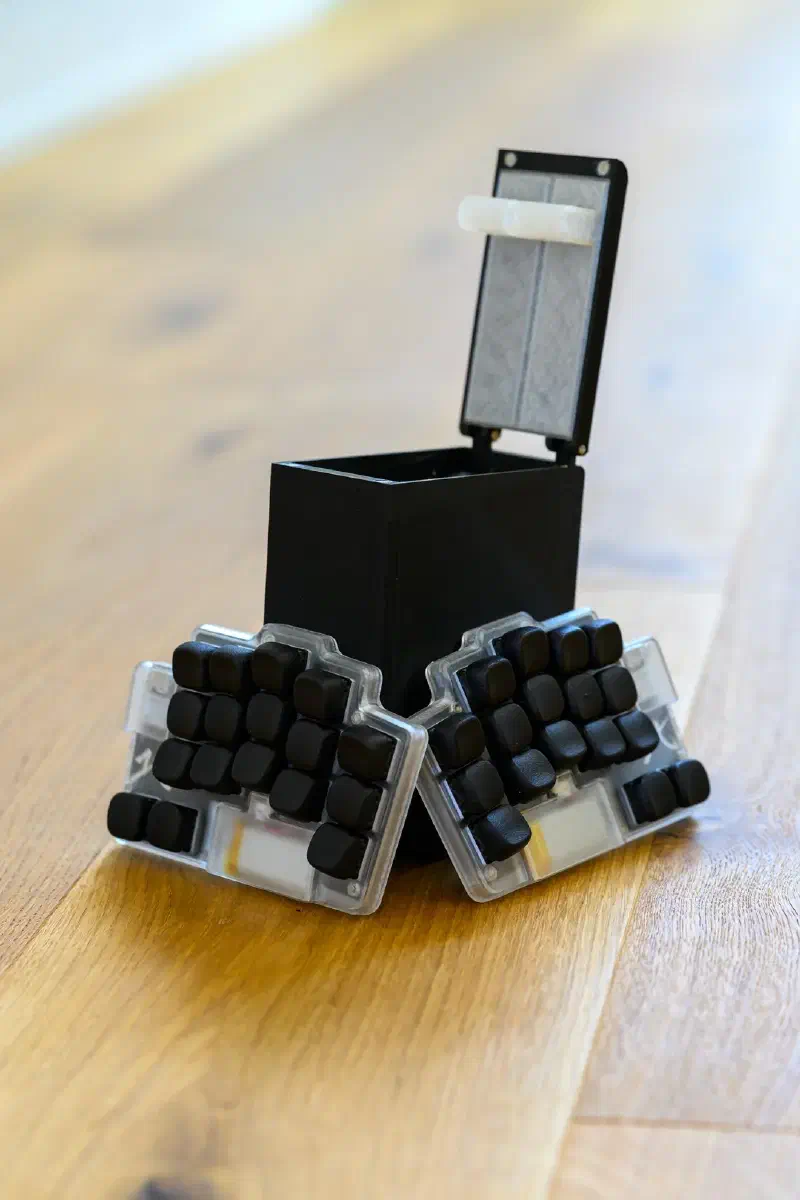
While I had not placed a PCBA order yet, I was confident I could produce one high-quality keyboard with great typing feel and minimal height.
But could I produce ten?
DokoDemo Ergo FE#
This time, I didn’t post on Reddit first, but on Discord.
As the server had been relatively active, I was pretty sure I could get 10 buyers through it.
I sold the 10 units in a few hours. The server only had 25 users at that time. Decent conversion rate.
I now had $2,000 and 10 keyboards to deliver.
The design#
First, I needed to review my design choices.
I was mostly happy but I knew I had gotten a bit too far with the thumbs.
I used an LLM again to create an interactive visualization of thumb clusters relative to the index resting position: you can see it here.
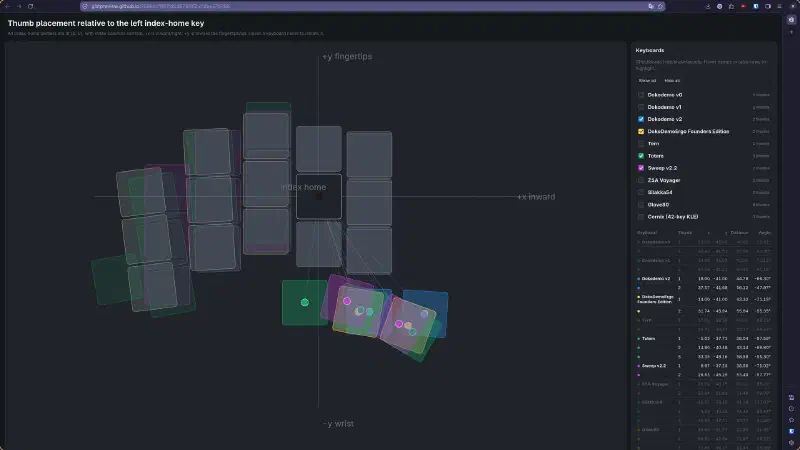
I also looped in the 10 founders edition buyers and they all agreed with my proposed new thumb cluster design.
It was time to start paying for manufacturing.
The PCBA#
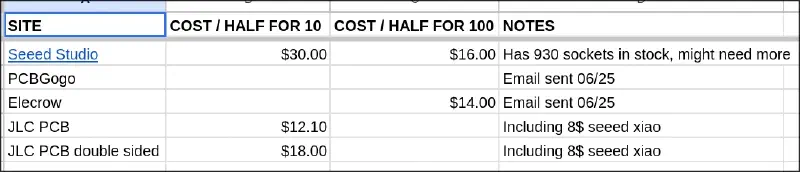
I picked JLCPCB to produce the PCBAs as they looked to be the cheapest for a 10-unit run.
My goal was to order 15 units to have one for me and a few spares just in case.
Sourcing#
The first issue I faced was sourcing two components:
- The Seeed XIAO BLE
- Choc V1 hotswap sockets
While JLC could assemble those components, they were not stocking them.
This meant I needed to set up shipments inside mainland China, as JLCPCB was not able to do it for me.
For the XIAO controllers, it was trivial: the official supplier supported shipping to mainland China.
I ordered 40 Seeed XIAO BLE controllers. 40, just to be safe, as only 30 were required. 40 had to be enough, right? There was no way there would be over 33% component loss during PCB assembly!
I wasn’t as lucky with hotswap sockets: AliExpress does not allow shipping to mainland China, and it was the only place I knew of to buy big volumes of Choc v1 hotswap sockets.
So I searched for solutions, and Taobao emerged as the most promising one: the giant Chinese domestic e-commerce platform.
Armed with my knowledge of traditional kanji from Japanese, I was able to navigate the website half decently and, with the help of an LLM and a few hours of my time, I was able to place the order.
JLCPCB and XIAO#
Once JLCPCB received all my parts and confirmed they were part of my inventory, I could finally make my PCBA order.
We exchanged a few emails validating the placement of components, and everything looked right.
A few days later, I got an email notifying me that 9 Seeed XIAO controllers had been melted during the manufacturing process. That was $76 worth of destroyed components, but I had planned for 10 extras!
Content with my extreme foresight, I was delighted to know I had provisioned enough controllers.
Except I got a second email two days later. The 9 melted controllers were only from the right-hand batch. While producing the left-hand batch, they melted 4 more controllers.
So in an order of 30 PCBs, they had melted a total of 13 controllers, each priced at $7.50 + VAT. They offered coupons on future orders to cover the cost of damaged components.
As I was still slated to receive 12 working left-hand PCBs, I agreed to receive 3 PCBs without controllers on them.
With 12 working PCB pairs, I should be able to fulfill the 10 orders + mine, and even make an extra one for my mom (yes, she uses my keyboards).
So they shipped the PCBs, and I waited.
As soon as I got the PCBs, I picked two halves and tried pairing them.
That’s when I realized that the right-hand PCB I received had issues: the pins underneath the XIAO were not connected to the battery or reset button.
I picked another right-hand PCB and tested it, and it worked perfectly. So, no design issues. Only manufacturing issues.
The next day, I tested all 30 PCBs I had received:
- The 12 populated left-hand PCBs worked properly, and 3 had no controller as notified by email
- 9 right-hand PCBs worked properly
- 6 right-hand PCBs were defective
As it stood, I could not fulfill my 10 orders. I would have to get my hands dirty.
Saving what I could#
Thankfully, I had acquired a hot plate for the previous prototypes, remember?
By heating the PCB underneath the controller to 300°C, I was able to get the controllers off the faulty PCBs without damaging anything else.
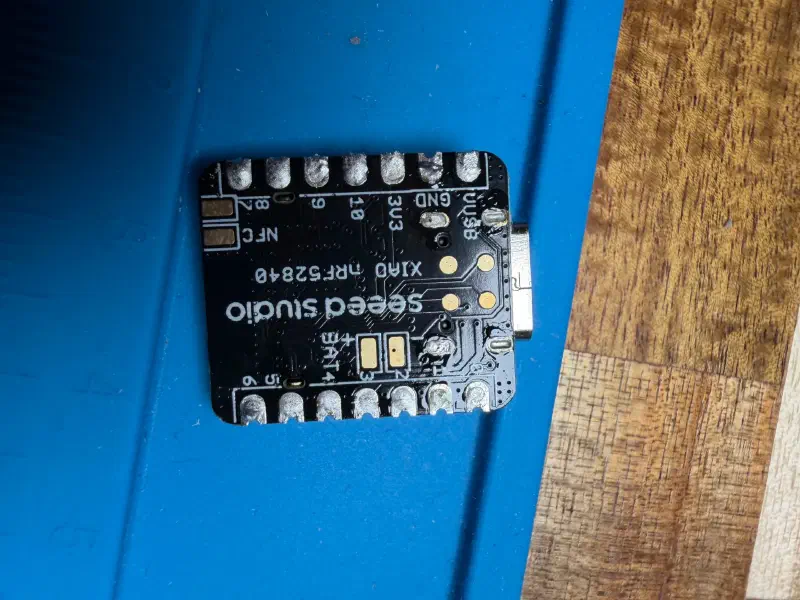
For all 6 faulty PCBs, the issue was the same: there was no solder on the battery and reset pads that were supposed to connect to the underside of the XIAO controller.
As you can see here, all 6 pads in the center are void of paste:
I contacted JLCPCB and am trying to determine what went wrong, both with the extreme amount of component loss and with the subsequent failures. I’m still in contact with them and hoping to get at least a partial refund.
Then I added some solder paste to the pads and put the controllers back on.
I saved 3 out of 6 PCBs that way!
With the 12 working left-hand PCBs, that would make for 12 working keyboards. Good enough!
The travel cases#
While I was doing all that, I made some design improvements to the hard + soft travel case.
My main issue was iteration time: when printed together, the PETG + TPU print took around 17 hours, even with dual nozzles.
While it did result in a very nice-looking case requiring no extra assembly, I couldn’t reliably iterate nor manufacture keyboard cases at that speed.
So I redesigned the case so that the TPU could be printed by itself, and checked if it would be cheap to get it printed by JLC3DP.
Unfortunately, 3D prints are priced by individual volume, and that resulted in a cost of over $30 per travel case.
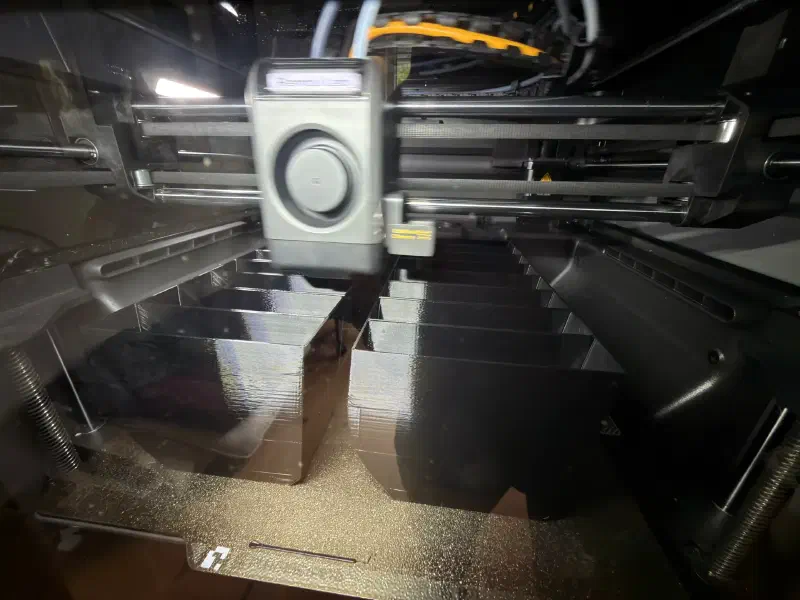
So, I started printing at home. With a single 30-hour print, I was able to produce 8 TPU inserts:
Then I asked the founders if they wanted other colors for their travel cases since I was ordering some more PETG.
We ended up with black, orange, dark green, and white:
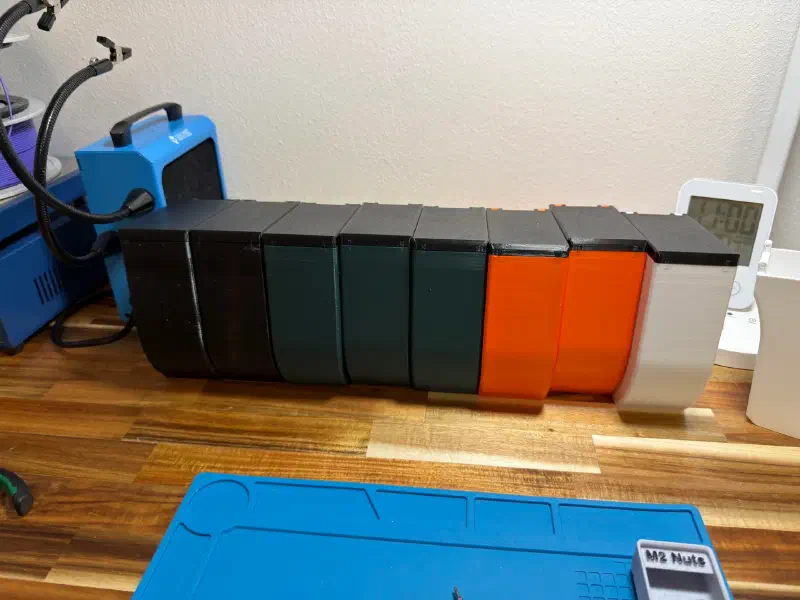
At this point I had everything down, right?
The dongles#
Wrong. I had promised that dongles would be included, and I realized halfway through the week that I had absolutely no plan.
My personal dongle was a nice nano v2 clone with soldered pins connected to a breadboard, linked to an arcade controller button to activate the flashing mode.
Not exactly production-ready.
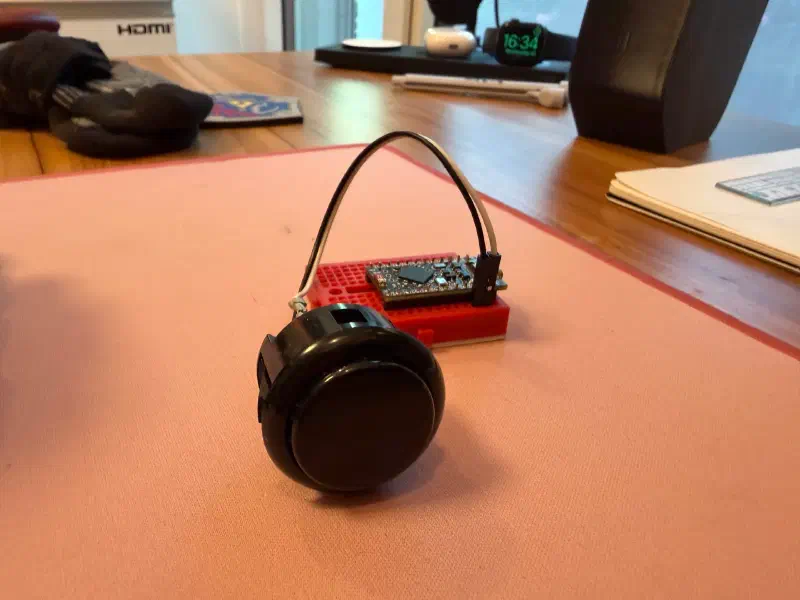
The most annoying part was making sure the flashing mode was easy to access, as it’s required to change the layout.
So I looked at the components I had lying around and I realized I had a small stock of shitty push buttons:
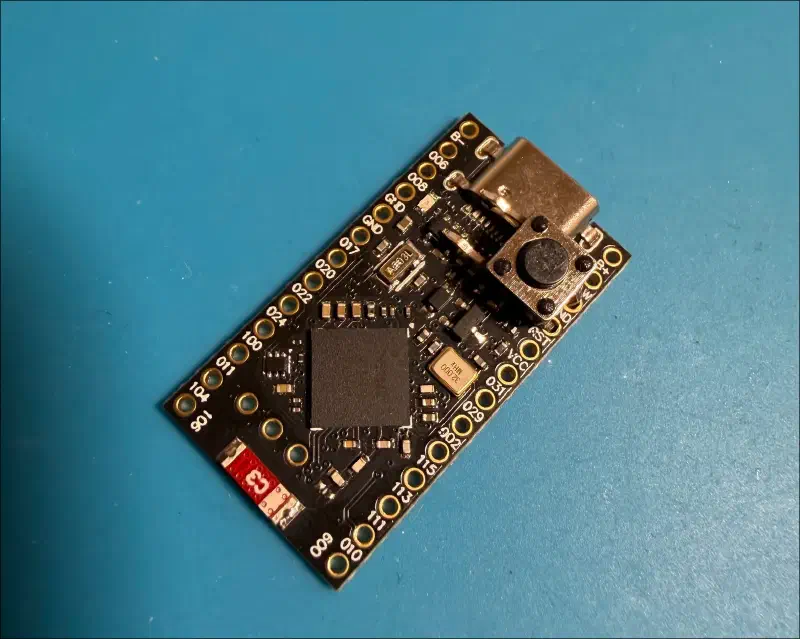
If it works, is it really that stupid?
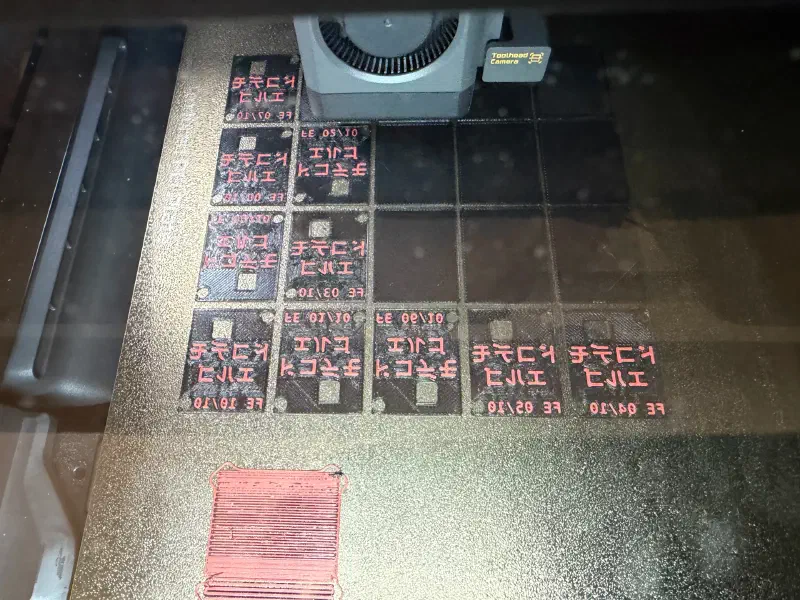
I had to install the FreeCAD 1.2 beta to have access to text in sketches, but then I could make a simple numbered dongle:
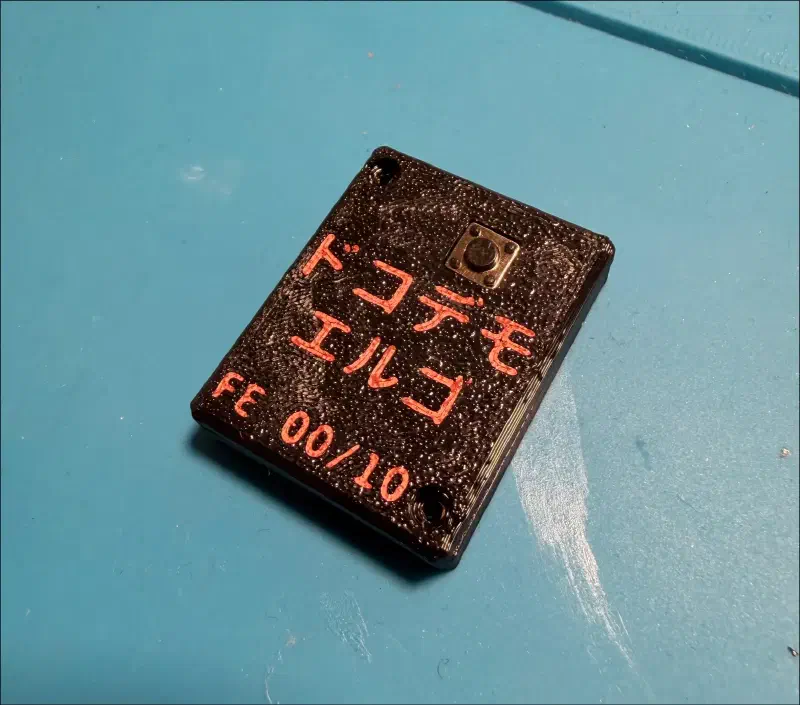
Ready for “mass” production!
The power switch#
I also had one recurring issue with my designs: to make sure I didn’t have components too close to the outside of the board and make KiCad happy, the power switch could not be too close to the side of the PCB.
This made the power button extremely hard to access without opening a gaping hole in the case.
So during the case design I made a smaller opening and counted on future-me to design a good power switch before the case arrived. Future-me was now-me, and I still wasn’t ready.
Turns out making a 0.4mm thick wall with a 0.4mm nozzle is not that accurate.
After a few changes to allow for bigger tolerances, and with a new 0.2mm nozzle, I re-printed the switch.
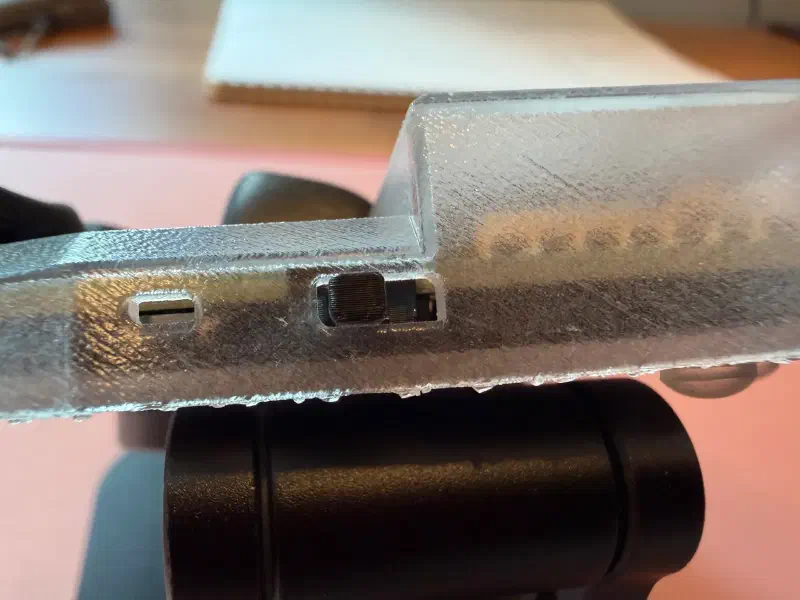
Does it move? Yes. Is it smooth? No.
I do feel like there has to be a more reliable and smarter way to make a power switch, but that’s a problem for future-future-me…
Building the DDE FE00#
Finally, it was time to build!
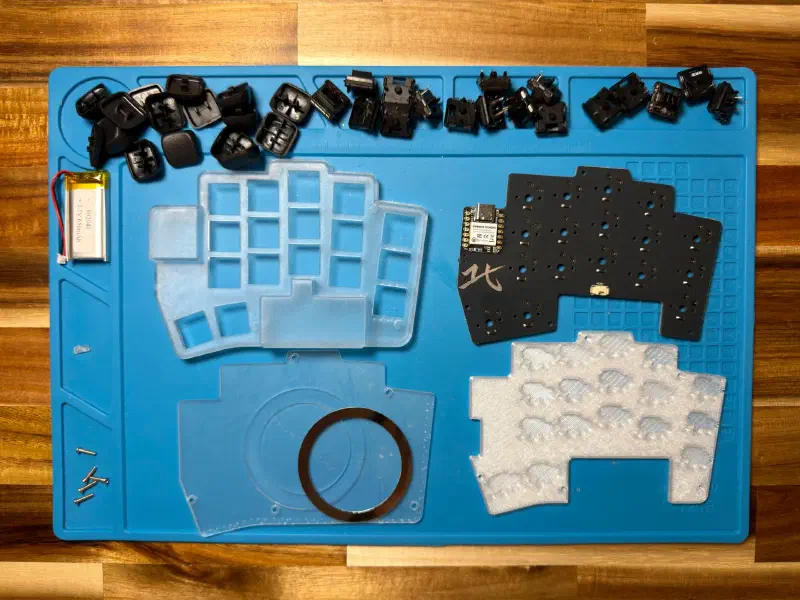
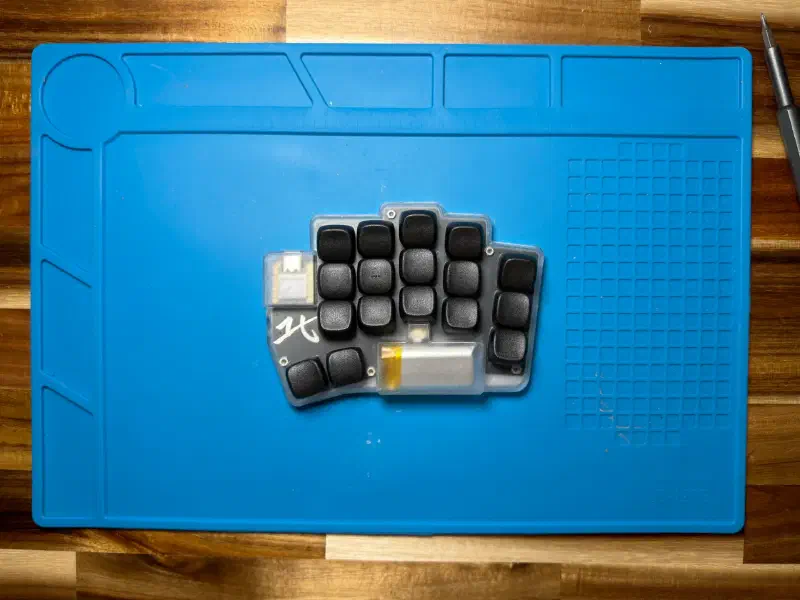
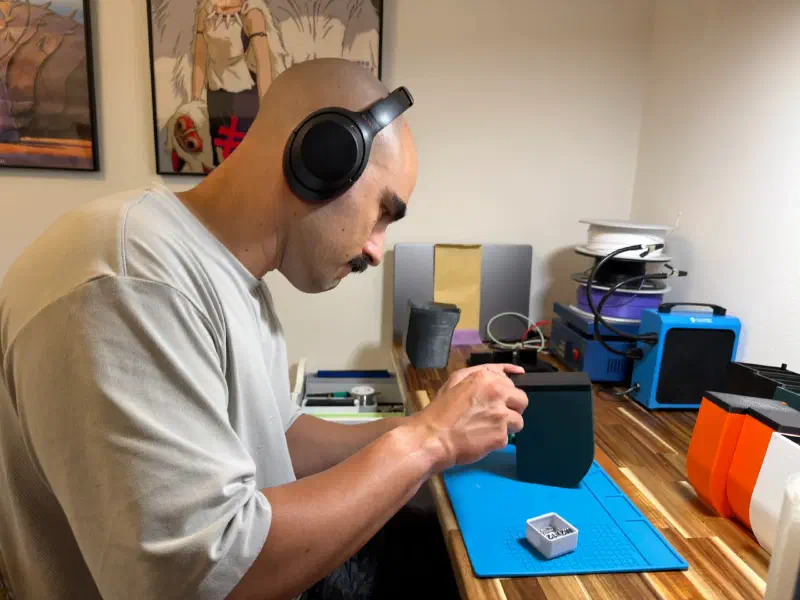
I made an assembly guide on the website for reference, so you can see all steps and components!
Packaging#
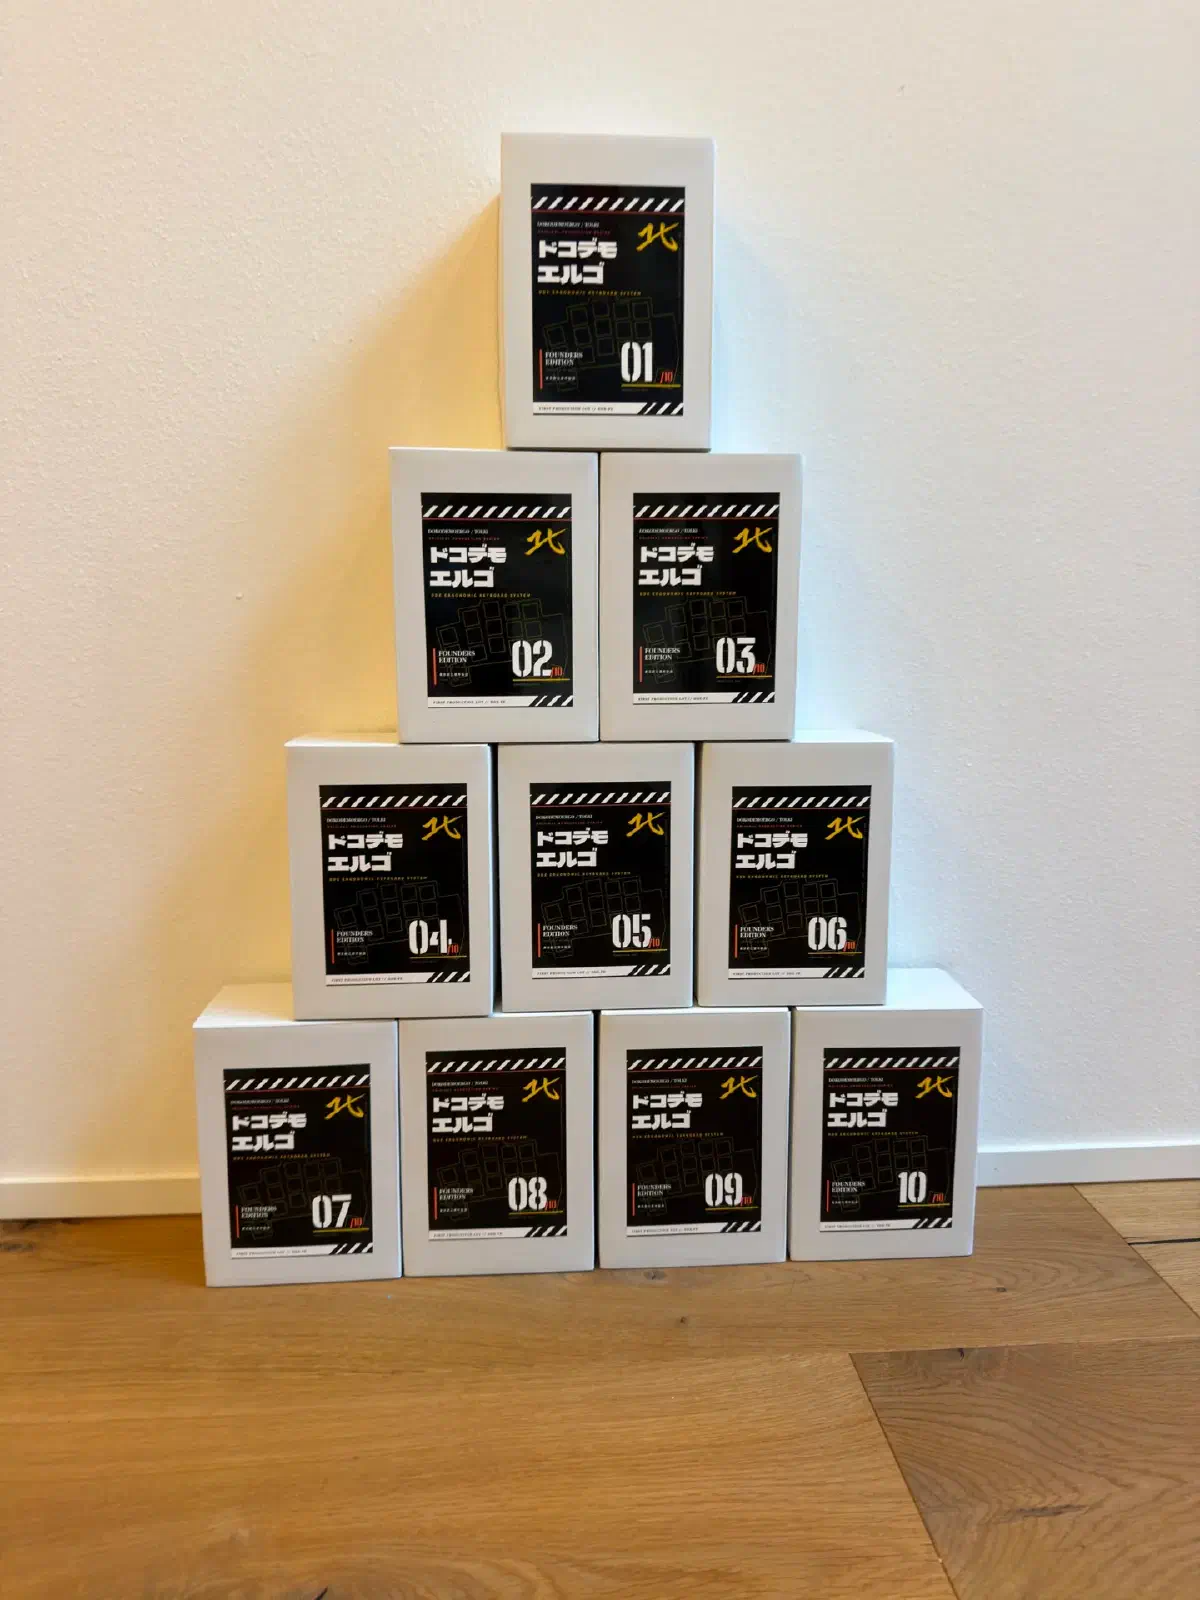
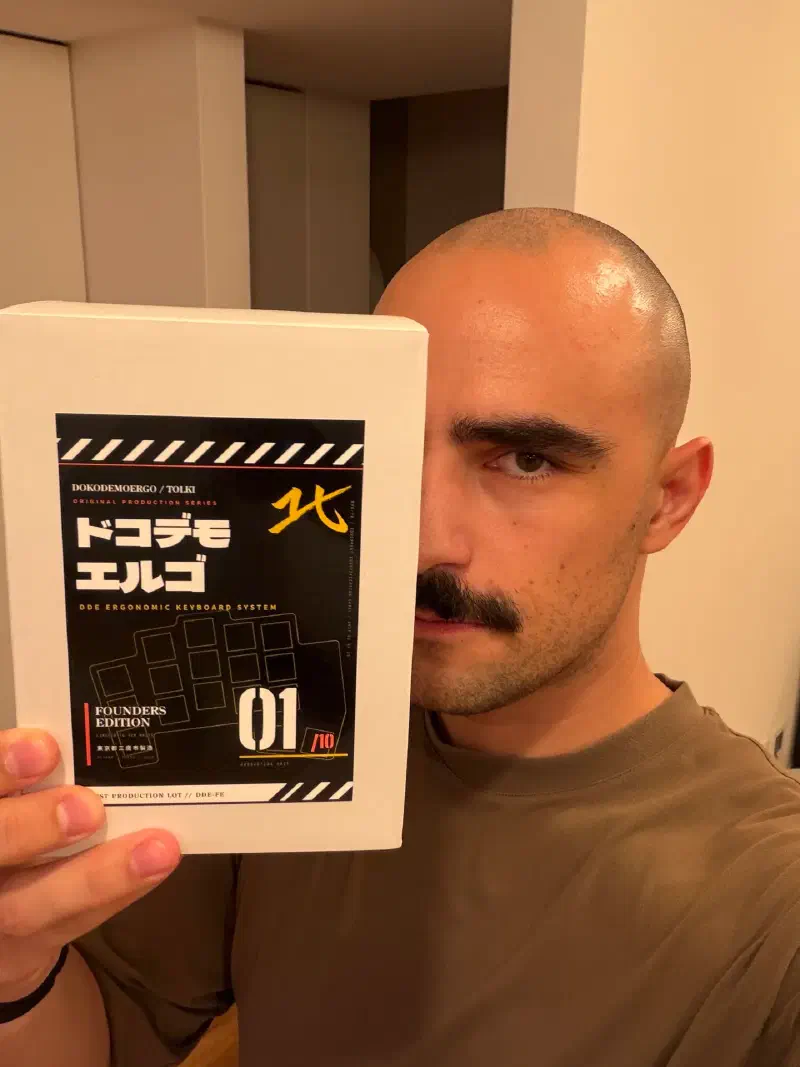
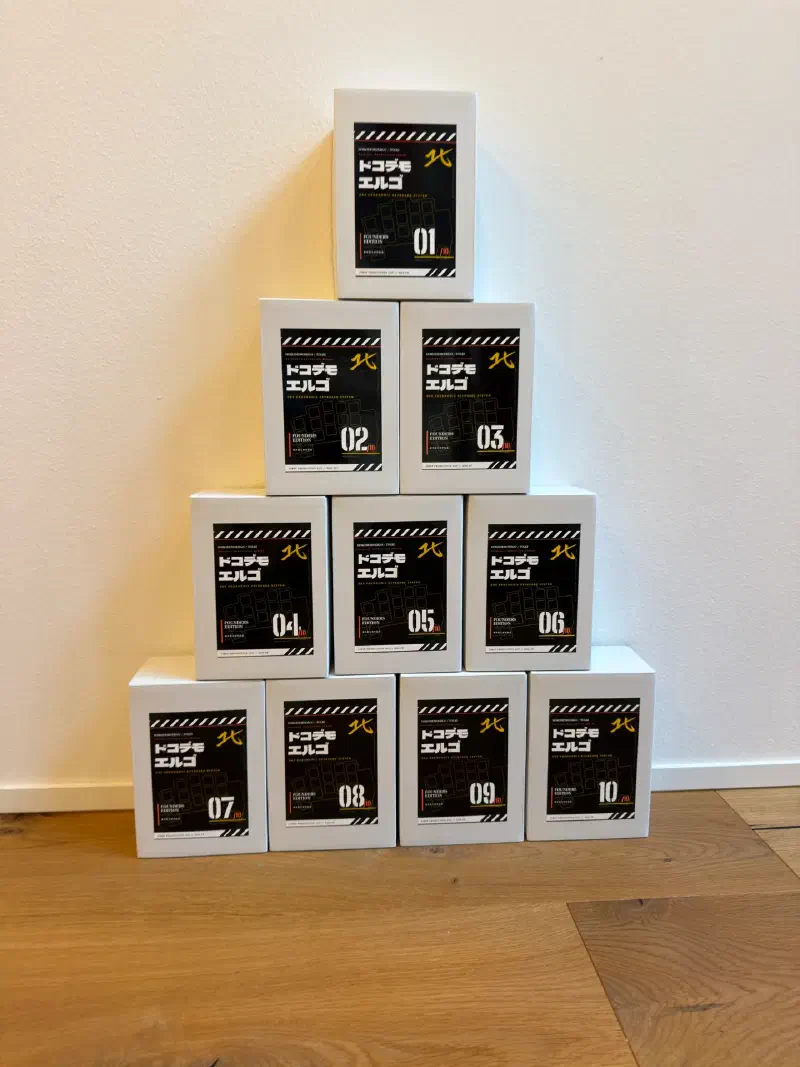
I didn’t have time to have custom-printed cardboard boxes, but I could get some stickers done at the nearby convenience store. The perks of living in Japan.
I used my measly design skills to create this:
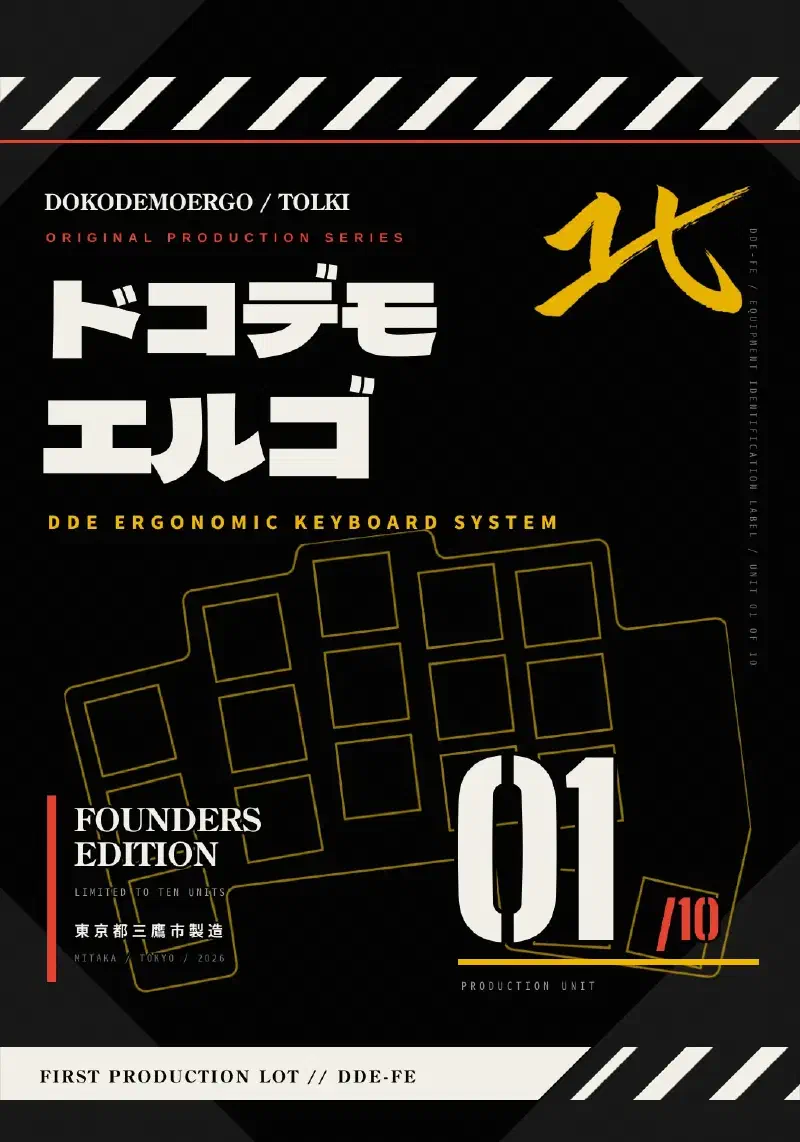
I think it came out pretty cool. I hate minimalism btw.
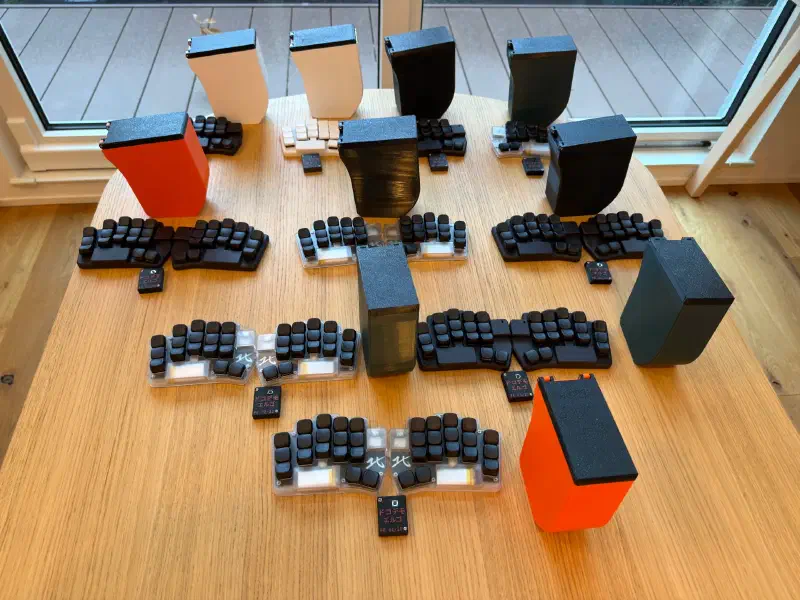
I was ready to put the keyboards in boxes.
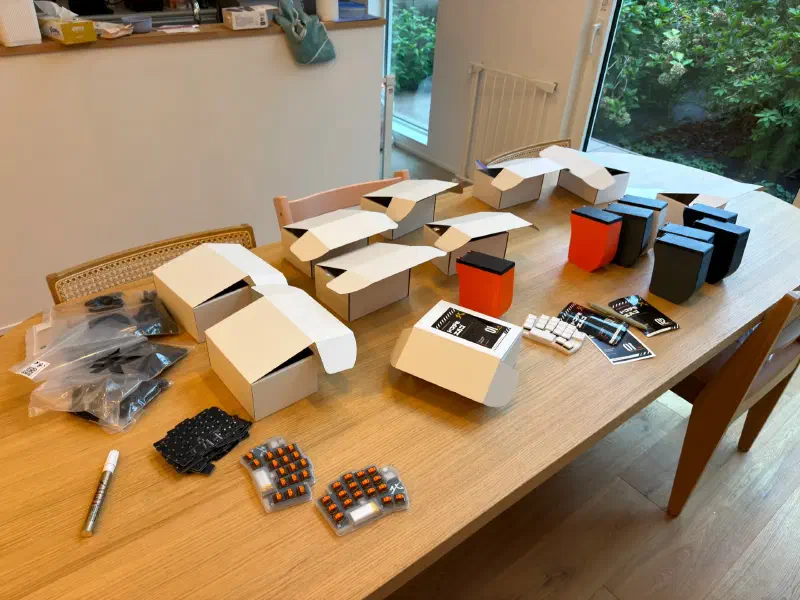
Shipping and taxes#
Then I discovered the joy of international shipping.
You see, the fun thing with US tariffs is that… they have to get paid ahead of time :D
So I installed the required Japan Post app, and I paid 15% tariffs + a ~$7 handling fee on each keyboard shipped to the US.
That’s $34 per keyboard. Say goodbye to my margins.
Let’s just say the bigger batch will likely be ~$200 + shipping and taxes.
But I made it work. With International Air Packet the price is at least reasonable, albeit the delivery is pretty slow.
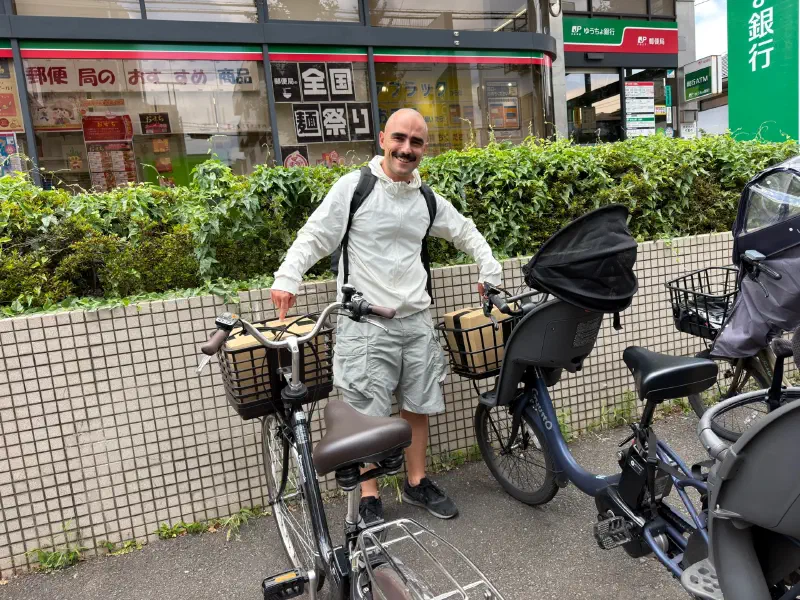
After preparing all the shipping labels, I went to the post office and took an hour of the staff’s time to get all paperwork right as I was shipping to 6 different countries:
And with this, I had built and shipped my 10 keyboards!
What’s next?#
The final cost-down#
With shipping done I could list my actual cost per unit:
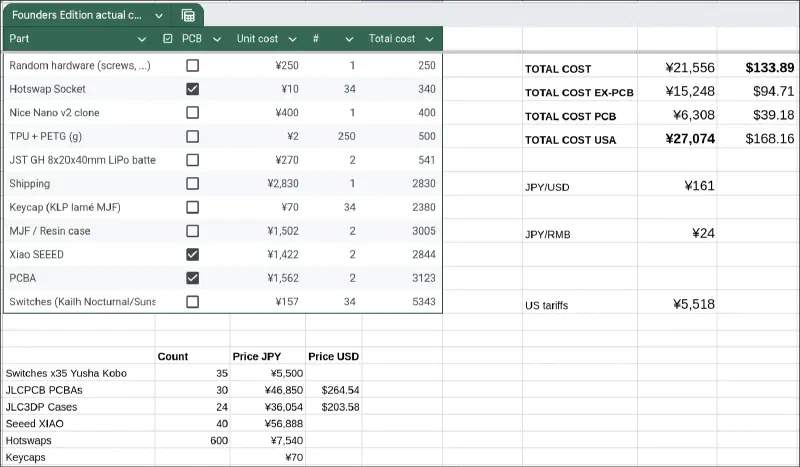
That was a $64 margin per non-US sale, and only a $32 margin on US sales. I’m also not counting some flat costs that popped up here and there, or my 3D printer.
With the amount of work required to assemble the keyboard, travel case, and dongle, as well as to package and ship everything, that’s not sustainable.
But if I scaled up to a bigger batch, there would already be economies of scale:
- Higher volumes of PCBA orders drastically reduce the associated flat costs (design checks, feeder setup, etc.)
- Bulk orders of keycaps and switches would save me a lot on two of the keyboard’s biggest costs
So now, how do I get from 10 to 100?
Option 1: Made in Japan#
The first option is to make everything I can in Japan: rent a space, buy resin printers, maybe hire someone, and start making as much as possible in-house to reduce costs.
With that, I’d be opening a small factory in Japan. In the medium to long term, I could even buy a PCB printer and assembly machine and try to make the keyboards 100% in-house!
While I love the idea, it requires the highest upfront investment and is also extremely complex. This would mean committing to making this project my full-time job.
And I’m a stay-at-home dad. I have around 4 hours a day I can dedicate to this project, at most.
Option 2: Made in China#
The second option is outsourcing the whole process to a Chinese factory.
With that route, my job would be to produce the most detailed manufacturing guidelines possible, contact different manufacturers to get quotes, and place an order for 200 keyboards.
I find it a bit sad because I would like to own some of the machines (I want a Formlabs Form 4, ok?), and really be a part of the manufacturing process.
But it’s more realistic to have it made in China. Send a PDF, pay some money, receive working, well-built keyboards.
Conclusion#
I’m happy that at least I was able to deliver a great batch of 10 units. While it was a bit rougher than I expected, mostly due to the PCBA issues, I feel like I delivered something nice.
I’m also happy with all I’ve learned so far from this project, and with all the interest around it. I really feel like there’s a niche that’s underserved here, and I feel like I have the right price point and features for it.
So, onwards to 100 (or 200), and if it works well… to 1000?
Oh and you can still sign up to the mailing list here. I’ll send an email once the process for the next step is finalized!